Friday, September 2, 2011

SKETCH phase: Staying organized

Time to get organized:
It's important for me to stay somewhat organized with my book making....
I can quickly accumulate a lot of "stuff", especially when I'm sketching so many things.
From experience, I need a place where I know everything will be that involves this project.
If you saw my studio space, you would understand why I can't find a good place there....
I have many creative projects going on and it is important for me to feel that each project
has it's own space.
So how do I make this happen?
A "mobile box" came to mind as a good option since I am creating my sketches in different locations. I may be at my drawing table one day or the kitchen table the next or the park to draw an object that will be in my spreads.
The box seemed to be an effective way...
I just grab the box when I'm ready to work on the book and head to the place I choose
for that sketch time.
Once there, I take everything out of the box that I need....use it...when I'm done,
pile everything back into the box and put the box away.
I'm easily ready for the next sketch time and I'm not scrounging around looking for different pieces I've already done.

Having decided this, I headed down to Wal Mart and bought a
shallow clear plastic box (with a snap on top) for about $6.
Loving it!
The size had to be big enough to handle the large galleys that the publisher sent me. These galleys are the exact size that each spreads (page layout with the type placement) will be
in the book. Here's the galleys...
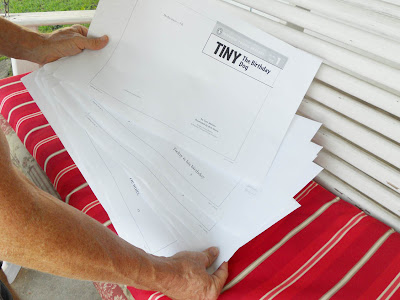

These will go in my box along with my sketching clip board ($2 at Wal Mart)...
some white copier paper to sketch on when I'm playing with ideas...
a black china marker (glorified crayon) that is great for sketching in this phase...
and the sketches that I've done so far.
Here's the sketches.....
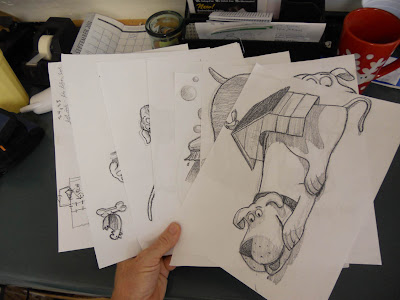
and here's the whole thing together....
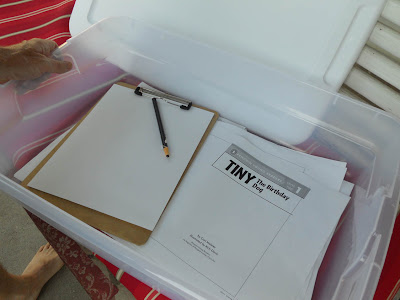

Now I'm ready for the all the sketching I will be doing over the next couple of months!
I feel better prepared and set up to succeed.
Mission accomplished!
This kind of simple organizing can be a significant contribution
to the creative process!
I'm not saying, "do it like me"....you can organize your things
any way you know will work best for you with the creative projects you have.
But I do recommend, "organize in some way", as it will help you in the long run!
Wednesday, August 31, 2011

Sketch phase: playing with the book cover idea

I'm working with an idea for the cover today and this will set the tone for the rest of the book. I want to give it special attention. Is there anything I should consider before I jump in and start drawing

Looking at the "Big Picture" first:
It occurs to me that this cover needs to be designed with the other 6 Tiny books in mind since this is a series and the books will be seen together when the publisher is advertising them. And I don't want to create a cover that is unlike the flavor of the other 6...because it would be an "oddball" that wouldn't feel like it fits with the others.
They all need to be their own cover, yet feel like they are on the same team.
(click on picture below to see it larger)

Brainstorming and decision making:
So I get the covers of the other 6 books out and look at them together.
I notice that I have created 2 kinds of covers....a cover that uses a scene that has things in it that have to do with the story (Tiny Goes Camping has a tent and sleeping bag on grass with Tiny and the boy).
The other kind I have created has a closeup of Tiny, the boy and the bird.
I count how many of each kind....and "scenes" have 4 and "closeups" have 2.
Personally, I like closeups because they are endearing and fun...sort of like the end of Porky the Pig cartoons where he is in the circle saying, "d-ah-d-ah-d-ah, dats all folks!". I decide to go with a closeup.

I only have one book that has the use of circle (I used an oval shape with the book Tiny the Snowdog)....so I decide it could be a good gamble to use this book cover with the same feel so that there would be two this way.

The Traditional part: Sketching
I make my drawing using a China Marker (black crayon) on copier paper not looking at any other tiny pictures...just out of my memory and I put the party hat on him. I'm just wanting to center in on Tiny at this point even though I know I will bring the boy and bird into the cover picture later on since they are the book's secondary stars....Tiny is the "STAR" of every book!


Beginning to Design with the Drawing using the Computer:
I scan the new drawing into my computer...bring it into a program called Photoshop (I'm using CS3 right now eventhough I will be upgrading to CS5.5 this week). I take the Tiny the Snowdog cover and cut out it's existing art and insert the drawing. This is all the "designing" part of being an artist...presenting your picture the best you possibly can in order to make the project's intent happen. This project's intent is to show Tiny is having a birthday which is a happy, fun time of celebration.

I take out the snowflakes and put in confetti and rearrange the words so that they read well in the upper space like the other 6 books do (remember, I'm trying to make it look similar to the others...kind of like a family of 6 kids that all look similar and now the family is having a 7th child! He needs to look similar as well.). At the end, I go ahead and quickly sketch in the boy and the bird with Tiny and change Tiny's eyes to be looking at the boy instead up at his hat.
(see top picture for the visual progress I have written about)


Evaluating today's work:
Well... I like what I've come up with today as a possible cover idea. I think it accomplishes the visual needs of this book and goes well with the other 6 in the series....but, it may change as I go along if I see something else could pictorially say what the book is about better. I'll just keep the door open in my mind just in case. Or, the publisher may want it changed for marketing reasons I know nothing about. For now, I can move on to the inside of the book now that I'm getting a better feel for this big birthday dog named Tiny!

Monday, August 29, 2011

SKetch Phase: First, the ideas in written form

Today begins a new step in the Sketch Phase. I've been reading through the story outloud over and over for the last couple of weeks....not making any drawings about it yet. Now it is time for me to try and enter the story visually.
Children's book illustrators do books differently according to the way they work and how they feel most comfortable and have the best results. For me, I usually try to envision the whole area or place where the story happens.
In this story about Tiny's birthday, it happens in the boy's house and partly in the backyard. That's it!

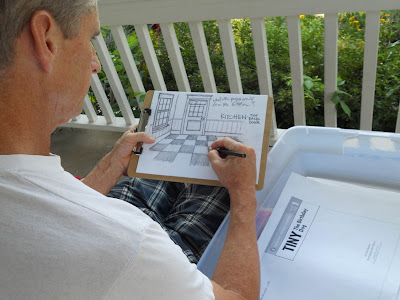
So I let myself make a floor plan drawing in my mind where the story moves around...room to room and out to the backyard. I have to show a kitchen (because a cake is being made in the story) and a big room where the "surprise" party will happen for Tiny at the end.
I begin to put down what that might look like in the top left corner and in the middle of the visual below. If you don't know what a "floor plan" is, ask your parents.

Since the story happens in this one place, I need to know it really well in my mind....be able to draw the rooms and what you would see in the rooms (the same way you know your bedroom well enough that you could describe it to someone else that had never been there before).
I might even make a little cardboard model of the rooms so that this place feels more real to me as I'm planning my spreads.
The more real I can make this for myself, the better the pictures will be for the story.
(click on the picture below if you want to see it bigger)


At the bottom left, I also drew Tiny sitting at the back door looking in as if you are standing behind him watching. He's got his big paw up tapping on the door....he's wanting to come in because he knows the boy is doing something special in the house and his curiosity is eating him up!

The rest of the things on the page have numbers large and dark with my scribbly writting underneath the numbers. The numbers are the page numbers of the book. I'm not trying to be neat with this picture....I'm just putting down ideas as fast as I can as I visualize what that spread in the book might look like.
Here's an example: ( this is written in the middle but over to the right)

26, 27
front door open-
animals coming in
with gifts while
banner is going
up in background
(farm animals from
other book story?)

What I was saying is, on pages 26 and 27, I could see the front door of the house open and different kinds of animals are coming in with gifts for Tiny while the boy is inside the room putting up a banner (that says, "Happy Birthday, Tiny!) with the help of a couple of other animals.
In parenthesis I noted something to myself about what animals these could possibly be.
In another book about Tiny on the Farm, the last page of the book shows other animals that like Tiny....I'm thinking these might be fun to use for this book since I've already created them and they have fun personalities. It also would be a good tie-in with another book giving continuity between the books and make the characters more endearing. Can't you picture them with presents and party hats looking really secretive and excited?!
Here is the picture I am referring to:


Next post, I will be showing you a clay figure I made of Tiny and how this can help me with the making of this book...